Beautiful Hardwood Bluetooth Speaker build
Let me walk you through an AWESOME custom Bluetooth, wooden speaker build that kept Santa’s workshop on overdrive for two solid weeks prior to Christmas. The result is a truly unique, functional and beautiful Bluetooth speaker that is wonderful to look at and listen to.
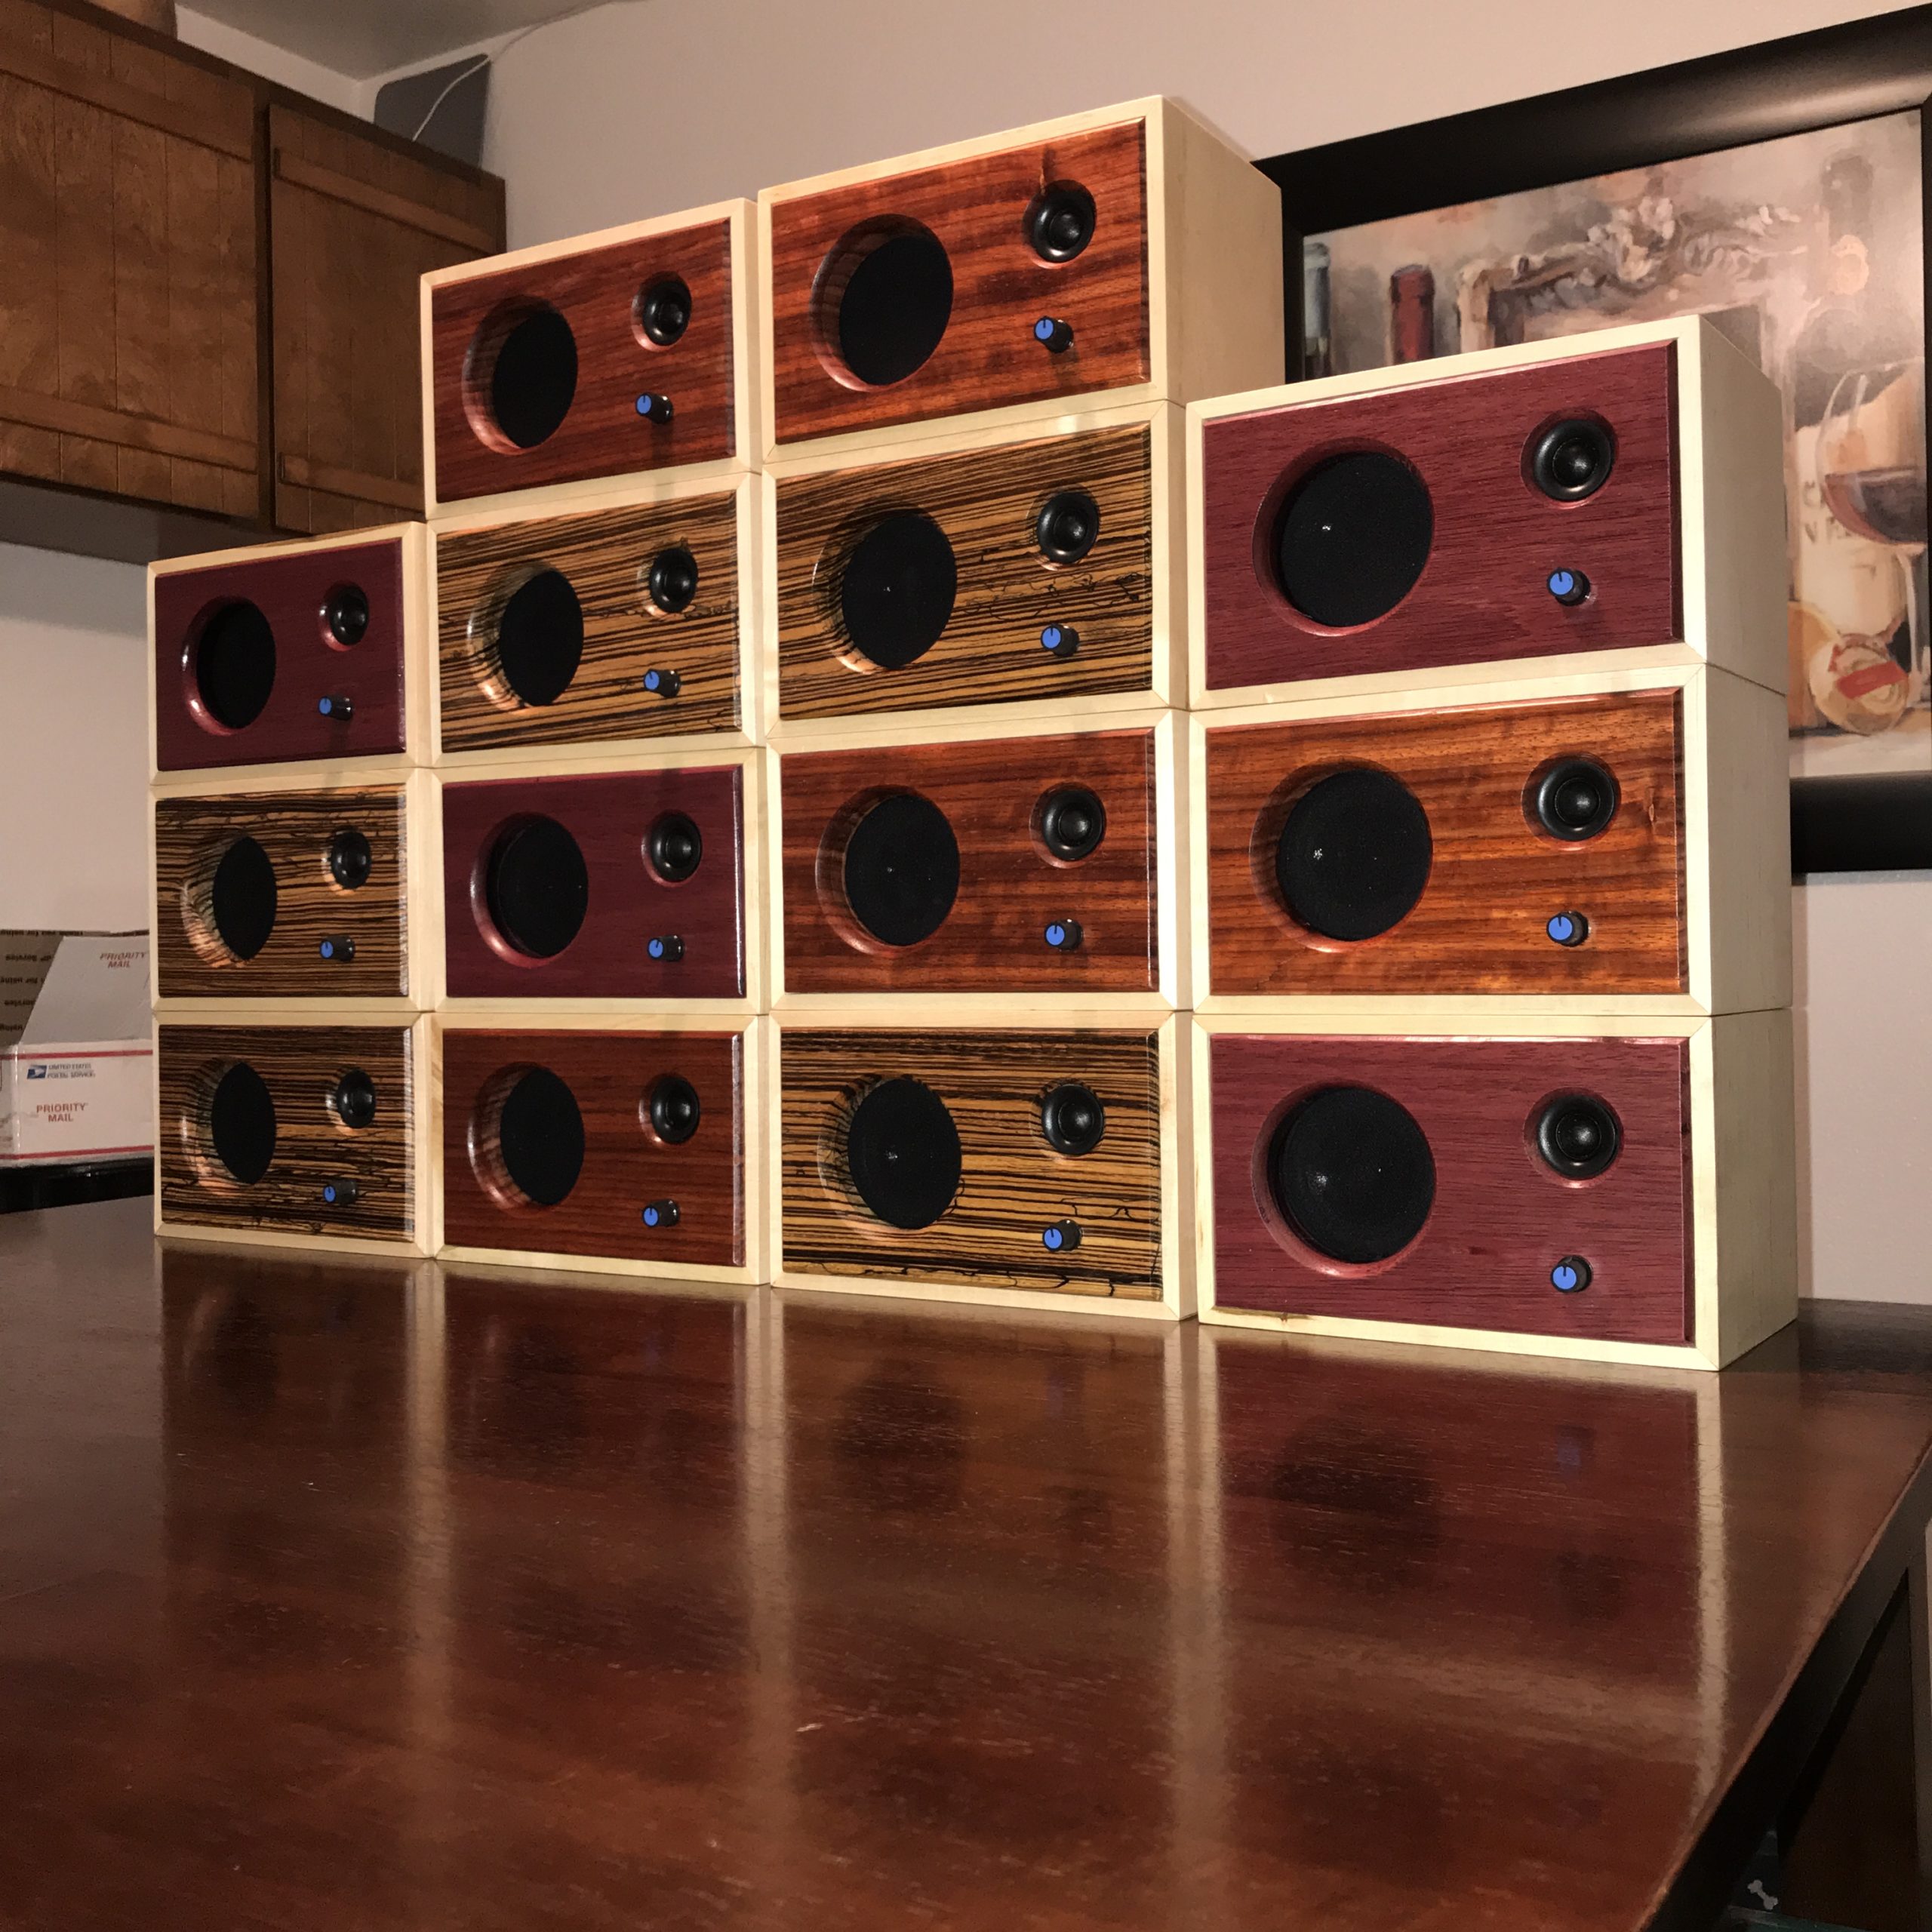
The order came in just 2 weeks prior to Christmas and of course, were to be gifts for Christmas. The project was wrought with late nights, all-nighters, shipping issues, challenges with proper fitting miter joints and more, but even with that, the 14 speakers were completed before Christmas!
You’re certainly less interested in the drama of the order and the craziness I had to endure, so we’ll skip all that and take you into some of the build and the source for the internal electronic components.
Speaker Kits were supplied by the awesome Kirby at KMAKits.com
The specific kit we used is the version 2 Fawn Bluetooth Speaker Kit as seen below.

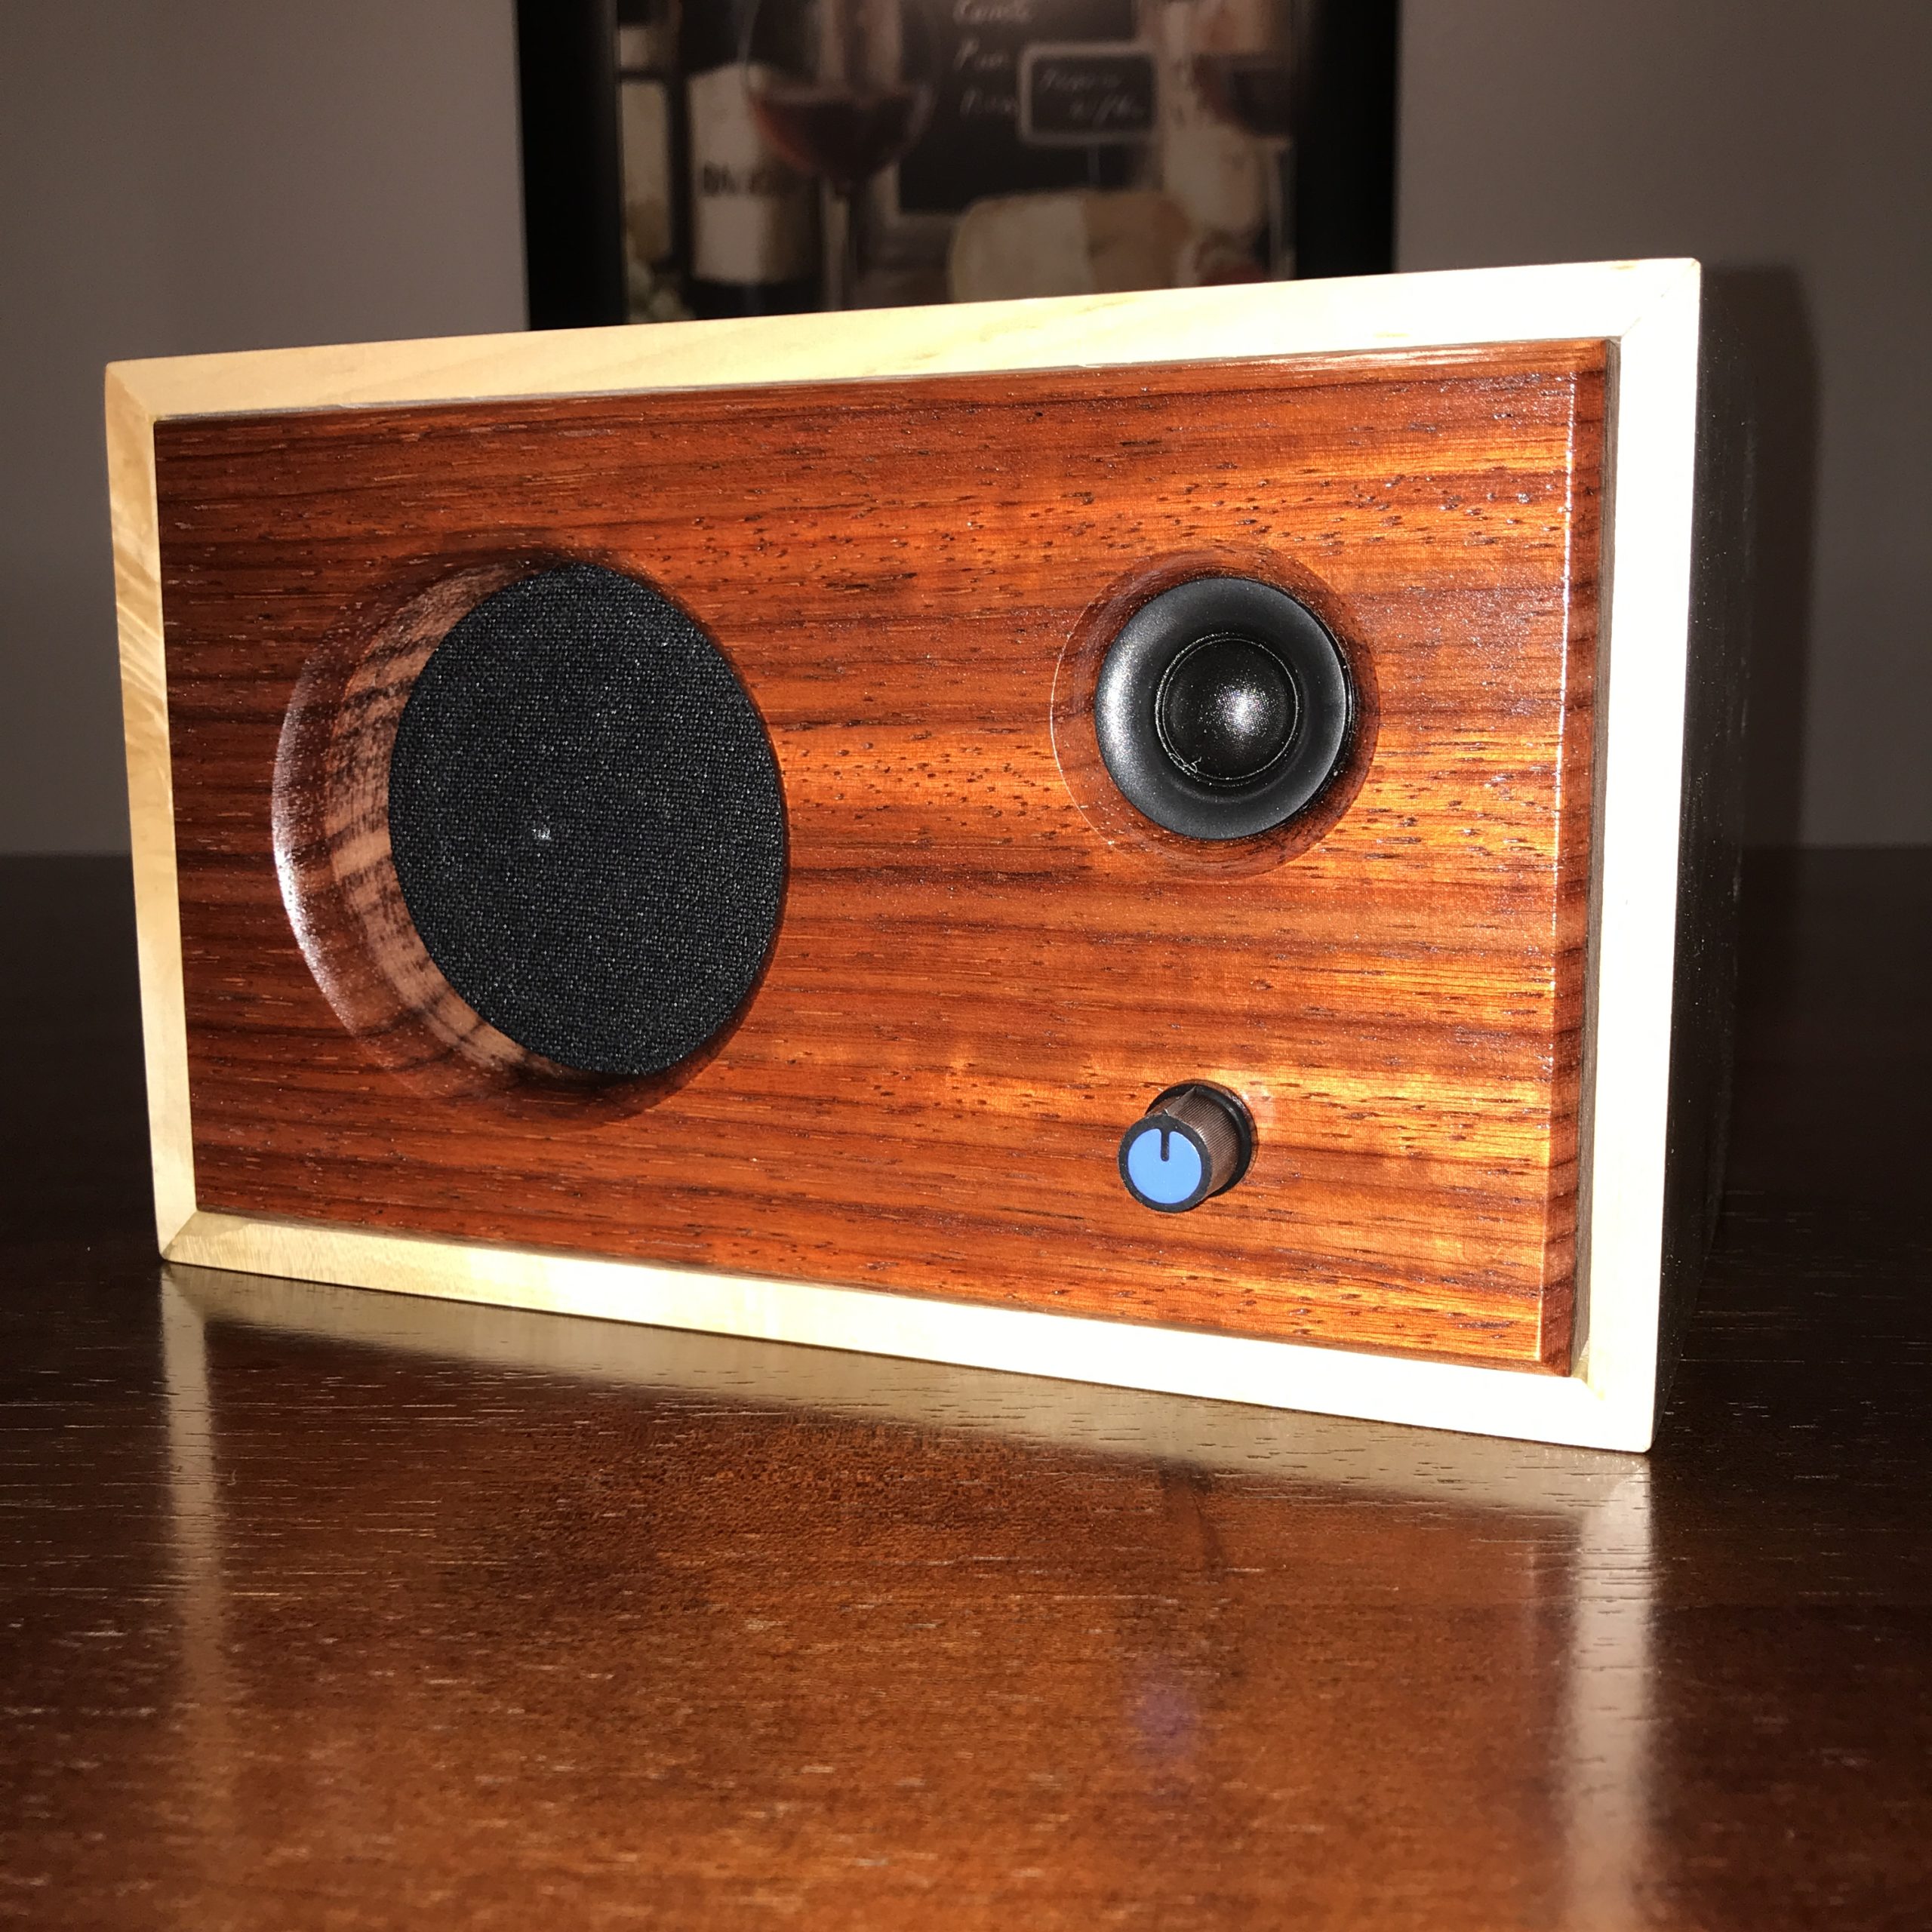
Now It should be said, I am not an electronic engineer, nor a speaker builder or designer, not even much of an audiophile. What I am is a resourceful woodworker with an extreme dedication to the highest quality I can produce. This kit requires some degree of woodworking skill, depending on the type of box/enclosure you choose to build. I of course went for a more complex, mitered box construction with solid Maple sides and hand-selected Zebrawood, Purpleheart, and Padauk for the faces. I chose these hardwoods for the natural beauty and contrast in colors.
You can follow Kirby’s instructions that guide you through building what I’d call a simplified wooden speaker box, no fancy miter joints required. Like I mentioned, my build was more complex and roughly followed Kirby’s earlier, Fawn v1 plans, design for the enclosure.
Miters From Hell!
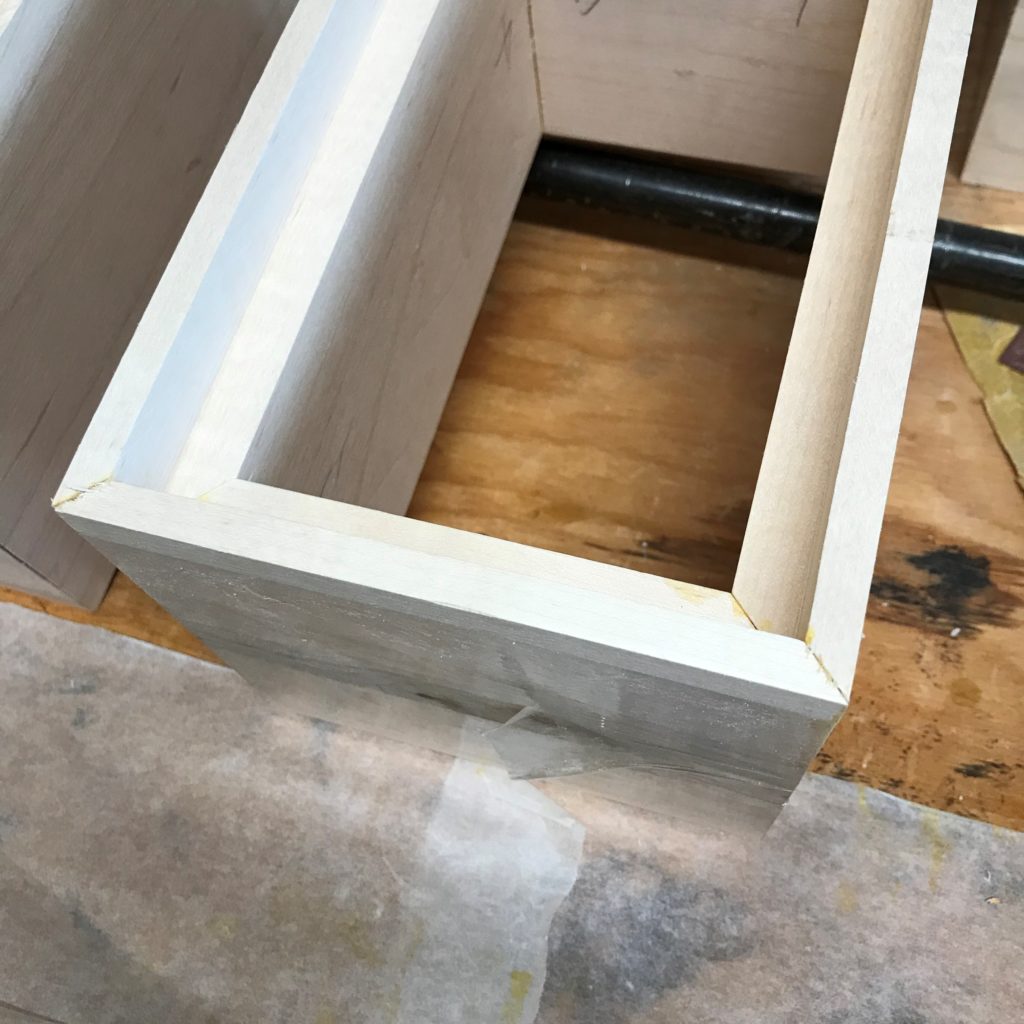
One Hundred and Twelve 45-degree miters!
If you’re not a woodworker, a miter joint (in this instance) is formed by cutting a 45-degree angle on two joining pieces of wood. Like what you’d find in most picture frames. You can accomplish this in a number of ways, one of the most common is with a miter saw or “Chop” saw. Two things I needed for this build is: To insure a perfect 45-degree cut, and accurately duplicate the length for all the sides. Fourteen speaker boxes meant I’m cutting 28 long sides and 28 short sides. I know that’s simple math, but in case you wonder, 2 short sides and 2 long sides equals 4 sides for a rectangle-shaped speaker box enclosure. 56 sides total, with each side requiring a 45-degree cut at each end. How many miter cuts is that? One Hundred and Twelve stinking 45-degree miter cuts! Spoiler alert! I did not get them correct in the first cut. I had to redo all of them to correct variances in the cut. Rather than spell it all out here, take a look at the video below for a walk-thru on the issue and solution I incorporated.
Assembly of the miter cut sides is pretty simple. I used a packing tape method to hold the glued sides together, no clamps required as long as you have proper fitting joints like these.
Maple is used for the sides.

The faces are from hand-selected Zebrawood, Purpleheart, and Paduak woods. In this step, I’ve roughed out the faces on my miter saw. You can also see, in the background, all the box sides are finished. The next step is to cut the faces to the precise size to fit within the rabbited recess on the face of the box.

The faces were cut to final size, holes drilled for the speakers and knob, then routed.
Final Assembly
This can be daunting with the many electronic components and wires and solder etc. Following the steps in the instructions helped make the complexity easier to handle.


I laid out all the electronic components and my finished (empty) speaker boxes, then methodically began to assemble each speaker one-at-a-time. It was easier for me to keep everything straight and without confusion to focus on one speaker at a time.

How much time did it take?
Glad you asked. Here’s a run-down on the final assembly.
For ONE speaker, it’s really not bad if you lay everything out in order including your tools like soldering iron, hot glue gun etc.. I’d say you could complete the assembly of all the electronic components in a couple hours time.
Once I got into a rhythm, it took me about forty five minutes to one hour for each speaker. Multiply that out by fourteen speakers; that will give you an idea how long I spent on just one of my all-nighters to get these all done and delivered!
Finished Product

I was quite pleased with the final result (and of course getting them all done). A pain in the back-side? Difficult project to finish? Absolutely on all counts. End result though is what really counts. You see, these were built for a customer I consider a friend, part of the family. The recipients of his ‘gifts’ are all also parts of my work/professional family. These are all folks I personally know and is the primary reason I said yes to such a time-crunch project. Each speaker built with tons of heart and soul. I poured out everything I could for the best quality I could produce, knowing it would ultimately bless someone.
My wish for each is:
Be inspired, crank it up and play whatever your heart desires!